Time to protect your brain. This is the number one most critical purpose of a skydiving helmet – it protects who you are. It might also keep your face pretty, under the right circumstances. In the plane, you are much less likely to get hurt if you hit turbulence and wack your head against the fuselage. Exiting the plane, especially with big groups, is another opportunity to have your head smacked into the door frame, or get kicked in the face by another skydiver. In freefall, you get some protection from head to head collisions. Finally, while landing, especially if you’re landing out or near obstacles, you get some added protection then, also.
Author: James
I’m writing this in August of 2023, and scams in the resell marketplace are going crazy. I’ve got a lot of links on where to buy used gear, and I still like those pages, but I don’t like how often we’re seeing people get ripped off… especially newer jumpers who are just learning the ropes.
When you’re buying used gear, the best method to keep from getting ripped off is to use an escrow service. A lot of riggers offer this; basically you pay the escrow agent, and the seller will ship the gear to that agent. Hopefully this person is a rigger, who can inspect the gear and verify that what is being sold matches the description the buyer and seller agreed upon. If everything checks out, the rigger sends payment to the seller, and delivers the gear to the buyer. Usually there’s a small fee associated with this service.
My rigger doesn’t like to handle other people’s money, so we typically do a variation on that theme. The seller ships to my rigger. When the gear checks out, I pay the seller, and after payment is verified to be received, delivers the gear. If he finds something wrong with the gear that wasn’t disclosed, I’ll try to renegotiate the price. If we cannot come to agreement, my rigger mails the gear back to the seller.
The point is, I’m not sending money for gear I haven’t inspected. And the seller is not sending me gear without receiving funds. We’re trying to protect each other, and keep the risk low for everyone.
Good ideas to verify the authenticity of the seller: do not buy from a social media account that isn’t a person. If it’s a legitimate skydive store selling used gear (these exist too), they have a website and a phone number (and a reputation). Verify it’s a real store by checking with friends in the sport and go for it. If the Ranch Pro Shop lists used gear, you can be sure it’s been inspected by their rigger and the description will match the goods. If it’s a Facebook user named “Skydive Gears” you might want to apply some skepticism.
I like to ask the person where they jump, see who we know in common, maybe even call their drop zone to verify that the person actually exists. Get a reference from their rigger, perhaps…
Want more ways to protect yourself? Here’s a great video from Tony Bourke. Take a watch and learn how to protect yourself.
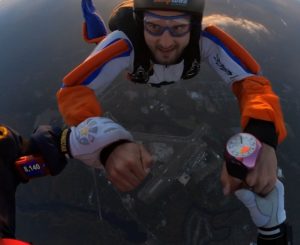
Okay… altimeters. How high are you? How do you know? Well, your altimeter, duh. That’s the name of the page, right? We’re going to talk about a few different kinds of altimeters. The main categories of altimeters are analog, digital, smart, and audible. I’ll give you the basics, some recommendations, and links where you can learn more at the bottom of the page.
I am a representative of Freefall Data Systems, and personally have flow several different FDS altimeters. You’ll see a preference for this USA based company on this page. It’s not to say that the other altimeters I mention are not excellent – there are a lot of great options on the market today. FDS just happens to be my personal favorite.
Analog Altimeters
It used to be almost every DZ started their students on an analog altimeter. It’s got a dial like a watch face with a needle that rotates to show how high you are. These are less expensive than digital altimeters, but they’re less accurate. It’s pretty hard to glance at your altimeter and see if you’re 300 feet up or 450 feet up. This doesn’t help students or newer jumpers dial in their landings. The best thing I can say about analog altimeters is that they don’t use batteries, so they will always work. I own one, but I think it may be time to sell it.
My personal recommendation is to skip the analog altimeters, but one of my mentors disagrees. His go-to setup is to wear both a digital and an analog, and he has frequently loaned his analog altimeter to another skydiver on the plane whose digital just ran out of batteries. I own both types myself, but at the end of the day, the analog altimeter is larger and less useful under canopy (the markings are too close to each other). I keep it for night jumps because it has a glow-in-the-dark face. If you ARE going to buy an analog, I can’t recommend that feature highly enough.
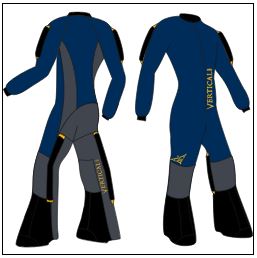 Newer skydivers look around the dropzone and see angle flyers and free flyers going up without a jumpsuit… while their instructors insist they grab a jumpsuit from the school’s closet and wear it on every jump. Sometimes they’re clean. Sometimes they aren’t. At some dropzones, it’s been a very long time since the student jumpsuits have been cleaned. And look at all the cool kids jumping in jeans and a skydiving jersey. Who wouldn’t want to do that?
Dress for Success
With all sports, the best participants could play the game in their pajamas and perform better than almost anyone else. But is that how they dress when they compete? No. They use tools tailor made to allow them to interact with their environment at the highest possible level. We’ll come back to the sport analogy in a moment, but let’s take a quick detour to talk about some of the different disciplines in skydiving.
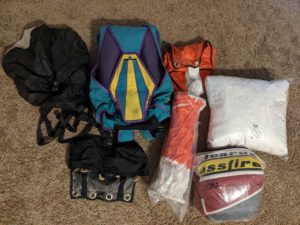
One of the most common questions I receive from newer skydivers is where to buy skydiving gear. This post, like the rest of this website, is geared towards jumpers in the United States. While the used market tends to be global, the section on new gear will only include US based retailers. If you’re shopping in other parts of the world, you will likely have other, better resources for purchasing gear.
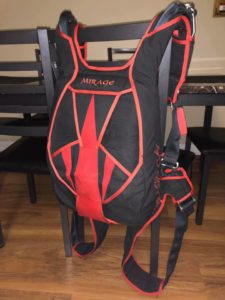
For your first parachute system, I typically recommend buying used… especially for your main canopy (see that page for details). Expect this process to take a while. I spent about three months putting together my first rig, but depending on your body shape and canopy size requirements it can be easier… or more challenging. In general, you can buy any part of your kit used, though I prefer a new helmet.
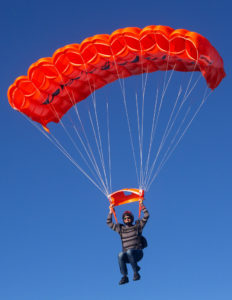 This is the last of my write ups for your parachute system, and is focused on that parachute most of us will never pack for ourselves, our reserve canopy.
Expect to spend between $1,400 to $1,750 for a new reserve… more on used prices below. Your reserve is fundamentally different from your main canopy. Regardless of what you fly for your main, your reserve is a seven cell ram air canopy. It’s designed to open quickly and has more docile flight characteristics than your main canopy. This canopy can only be packed by an FAA Senior or Master rigger. After 180 days, if it has not been deployed, your reserve will need to be repacked by a rigger, giving him or her a chance to verify its airworthiness.
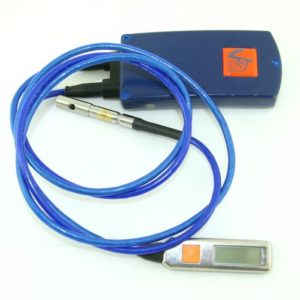 AADs. Who needs ’em? Well, everyone who skydives, that’s who. If you fail to open your main parachute for any reason, your AAD will open your reserve at a predetermined altitude. The purpose of this article is not to explain how they work, I’ll cover that later. For now, a I’ll offer a few opinions on buying an AAD, and then share some other excellent resources on the Web from which you can learn so much more.
Your AAD may be difficult to purchase used. They’re typically around $1,200 new, and they basically depreciate over the life of the unit. A Vigil that has an expected lifespan of 20 years, and is 5 years old? That should cost about 75% of the cost of a new Vigil. You can hedge one way or the other based on whether the AAD needs service soon, but other than that, it’s pretty basic and straight forward. Why are they hard to find used? Because a used one will always be less than $1,200… and if you’re going to the expense of putting a new rig together, this is one place where, if you CAN find a used unit, you can save some money.
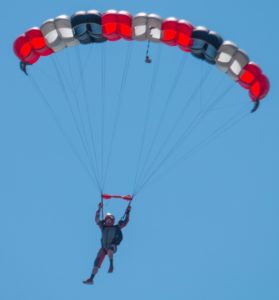 This article is for someone who is ready to buy their first main canopy. Here’s a picture of me with my first wing, a Sabre2 210. Thanks to Dave Bryce at Jumptown for the picture.
Make sure you scroll all the way to the end of this article for additional resources. I’m including another excellent video from Tony Bourke on selecting your first canopy. He gets much deeper into canopy selection, including six recommendations and a few runners up. If you are in the market for your first canopy, please watch his video.
You’re ready to buy a parachute system. There’s a certain order in which this should be considered, and the first thing to think about is what size canopy you want in your container. Beyond that, there’s still plenty to think about. Freefly friendly, safety, maintenance, age of the components, how well it’s been maintained, where the system was jumped, where the manufacturer is located (this can make it easier to get parts, for example), and more.
Beyond what we cover here, there are additional links at the bottom of the page to learn more. Check ’em out.
For this page, I’m going to start with the assumption that you know what size wing you’re going to fly, and we’ll go from there. This is mission critical… the smaller your canopy, the faster it flies, and the smaller your lines are. These are both critical, and can make things more challenging for lighter jumpers looking to buy their first system. Someone who weighs 150 pounds with all their gear on might be trying to get a wing loading of 1.0, which will put them on a 150 square foot canopy. On the one hand, 1.0 is on the lighter side for wing load, but any canopy sized 150 square feet or smaller is considered a high performance canopy. Continue reading “Containers”
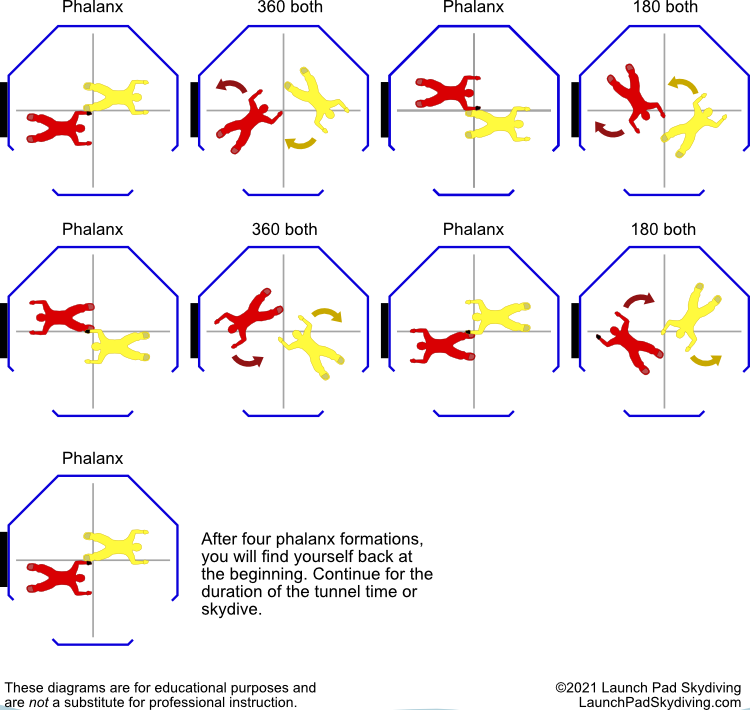
Today’s two-way drill is the Phalanx 360/180 drill. In this sequence, only one formation is used, the Phalanx. First one skydiver will take the formation grip offset to the right, then after a 360 degree turn by both divers, offset to the left. After both fliers take a 180 degree turn, the drill is reported for the other flier.
These diagrams show the drill being performed in a tunnel. Note how each Phalanx has both fliers lined up with a line going down the center of the tunnel. This helps the fliers maintain relative body position, and it also informs the turn direction: always turn towards the center line in this drill.
Find a printable PDF of this dive flow here.
As always, remember to get professional instruction before performing any skydiving or tunnel flying activities.

